Set up nameserver DNS with WebHost Manager (WHM)
Follow these steps to use your own domain name as a nameserver for websites your server hosts.
Required: Before you begin, set up a WHM account for your domain name. For more information, see Create an account in WebHost Manager (WHM).
- Log in to WHM using root for your username and your server's password at https://yourserverip:2087, where yourserverip is your server's IP address.
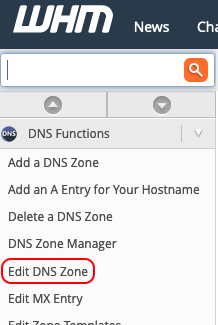
- Below DNS Functions, select Edit DNS Zone.
- Select the domain name you want to use, and then select Edit.

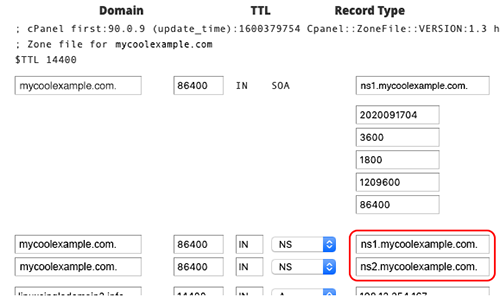
- For the two rows with the menu displaying NS, edit the right-most columns to ns1.your domain name. and ns2.your domain name., respectively.
Note: Don't forget the period character (".") after your nameserver in these fields.
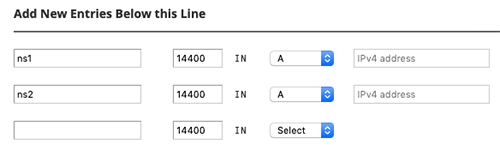
 In the Add New Entries Below this Line section, do the following in the first row:
- First field: Type ns1
- Second field: Type 14400
- Third field: Select A
- Fourth field: Type your server's IP address
- First field: Type ns2
- Second field: Type 14400
- Third field: Select A
- Fourth field: Type your server's IP address
- Select Save.
Note: DNS can take 24-48 hours to propagate once these changes have been made.
- Add your own host name to use your domain name as a nameserver.
- Then change the nameserver for your domain to your new custom nameserver.
Then, in the second row, do the following:
Related steps
You now need to complete the following steps to use your domain name as a nameserver:
